
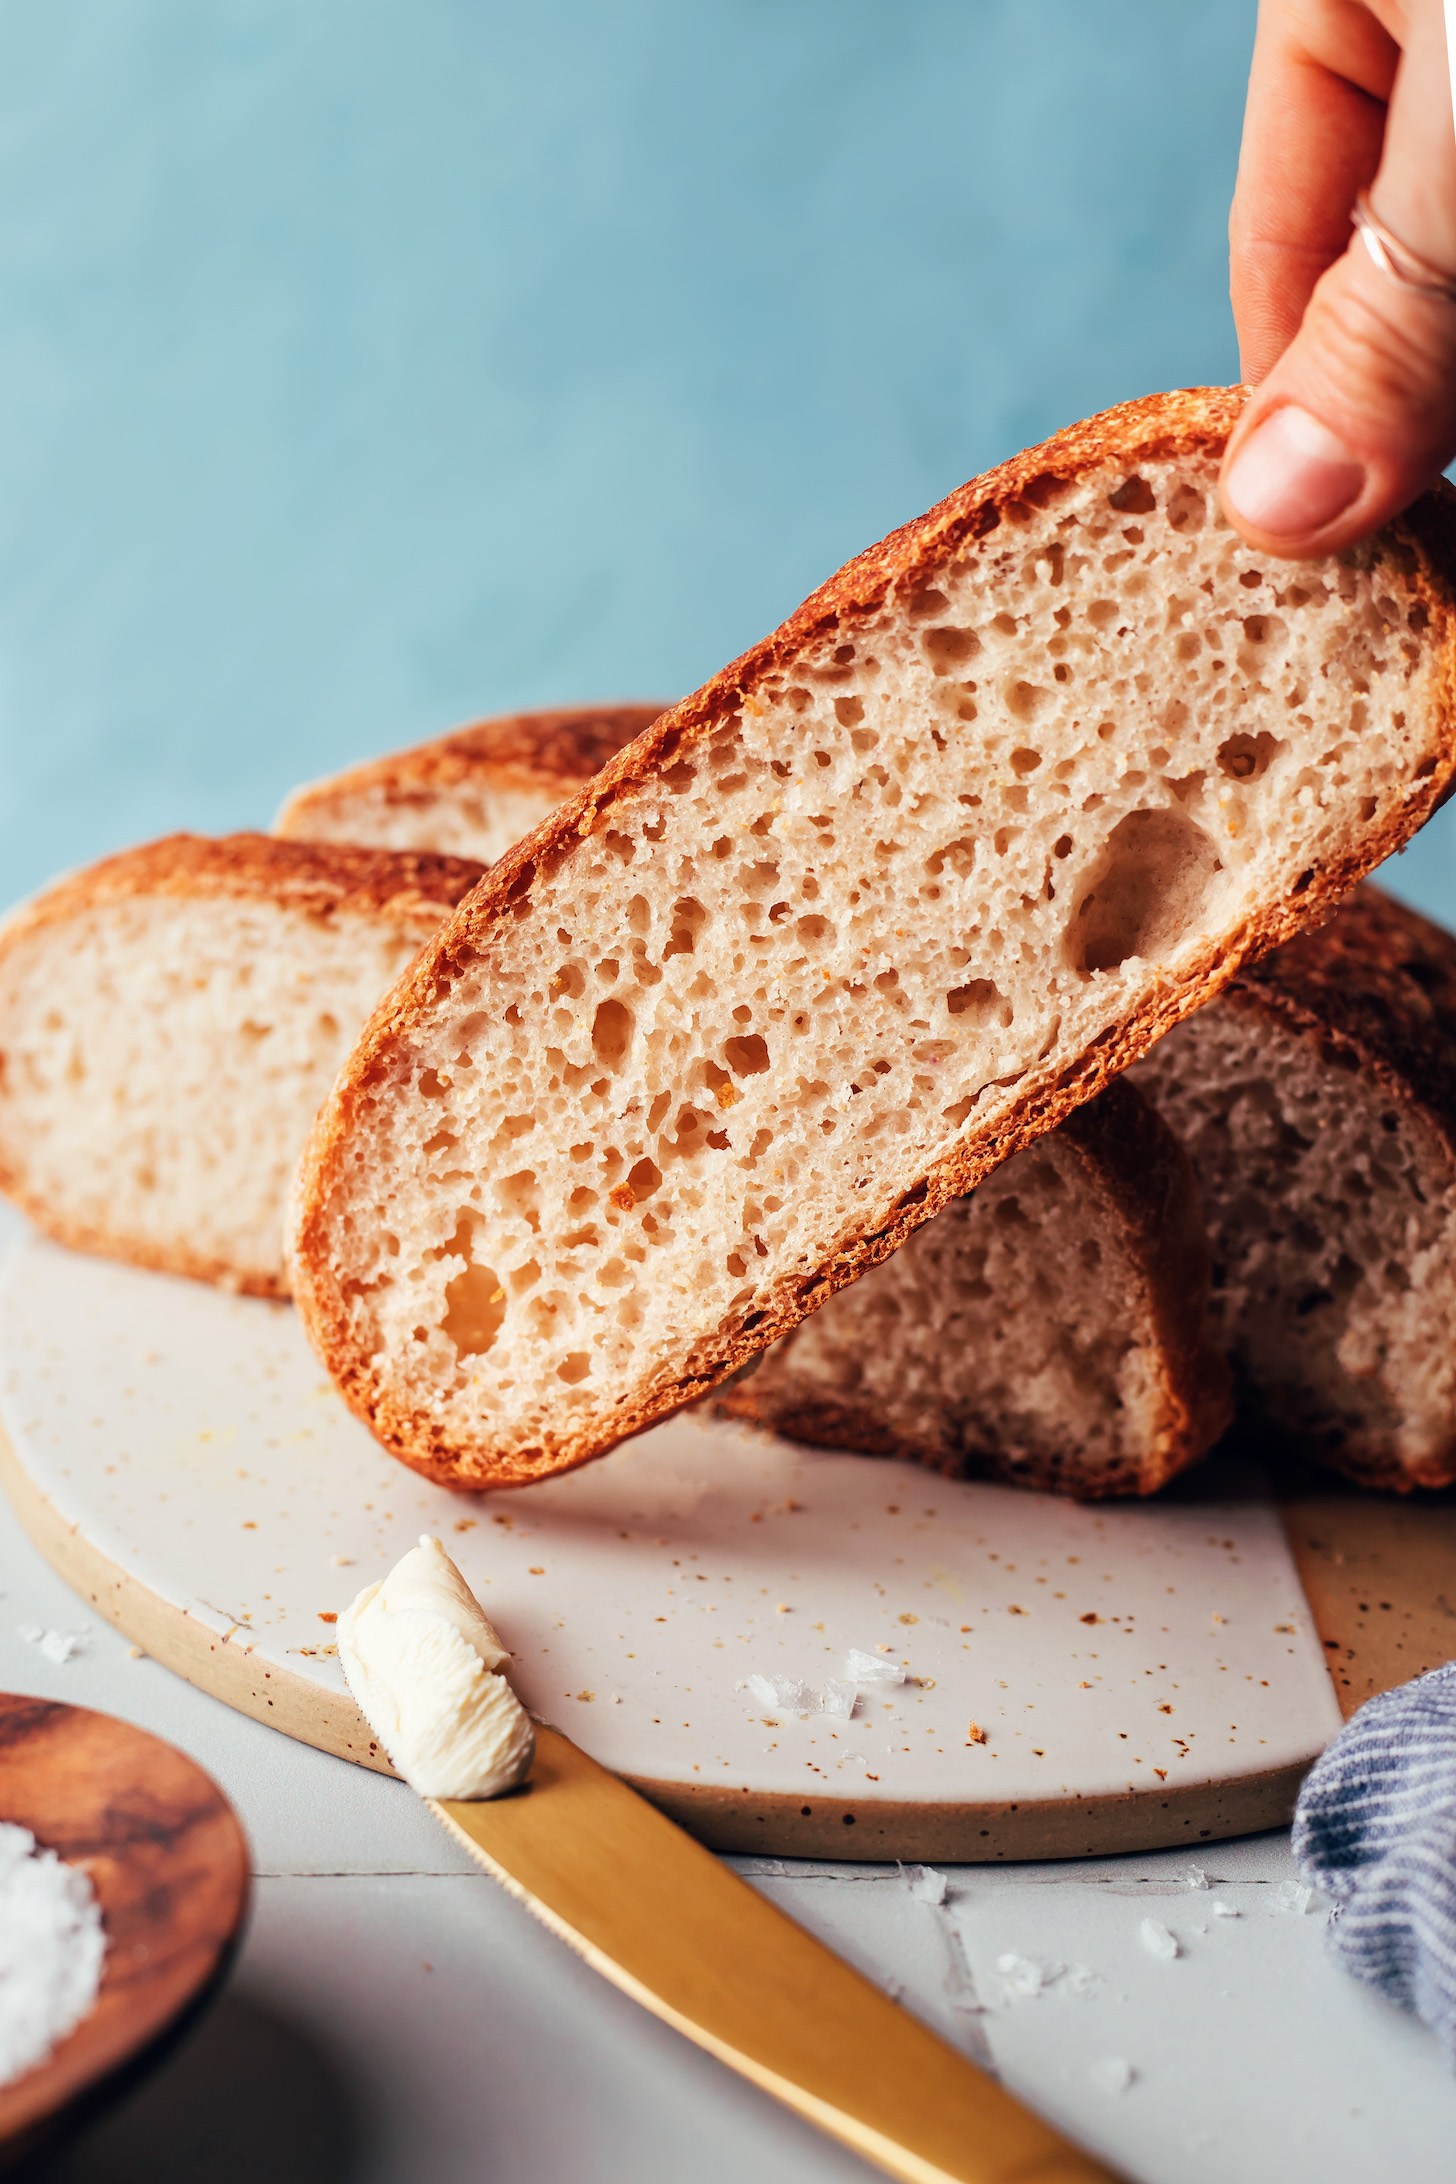
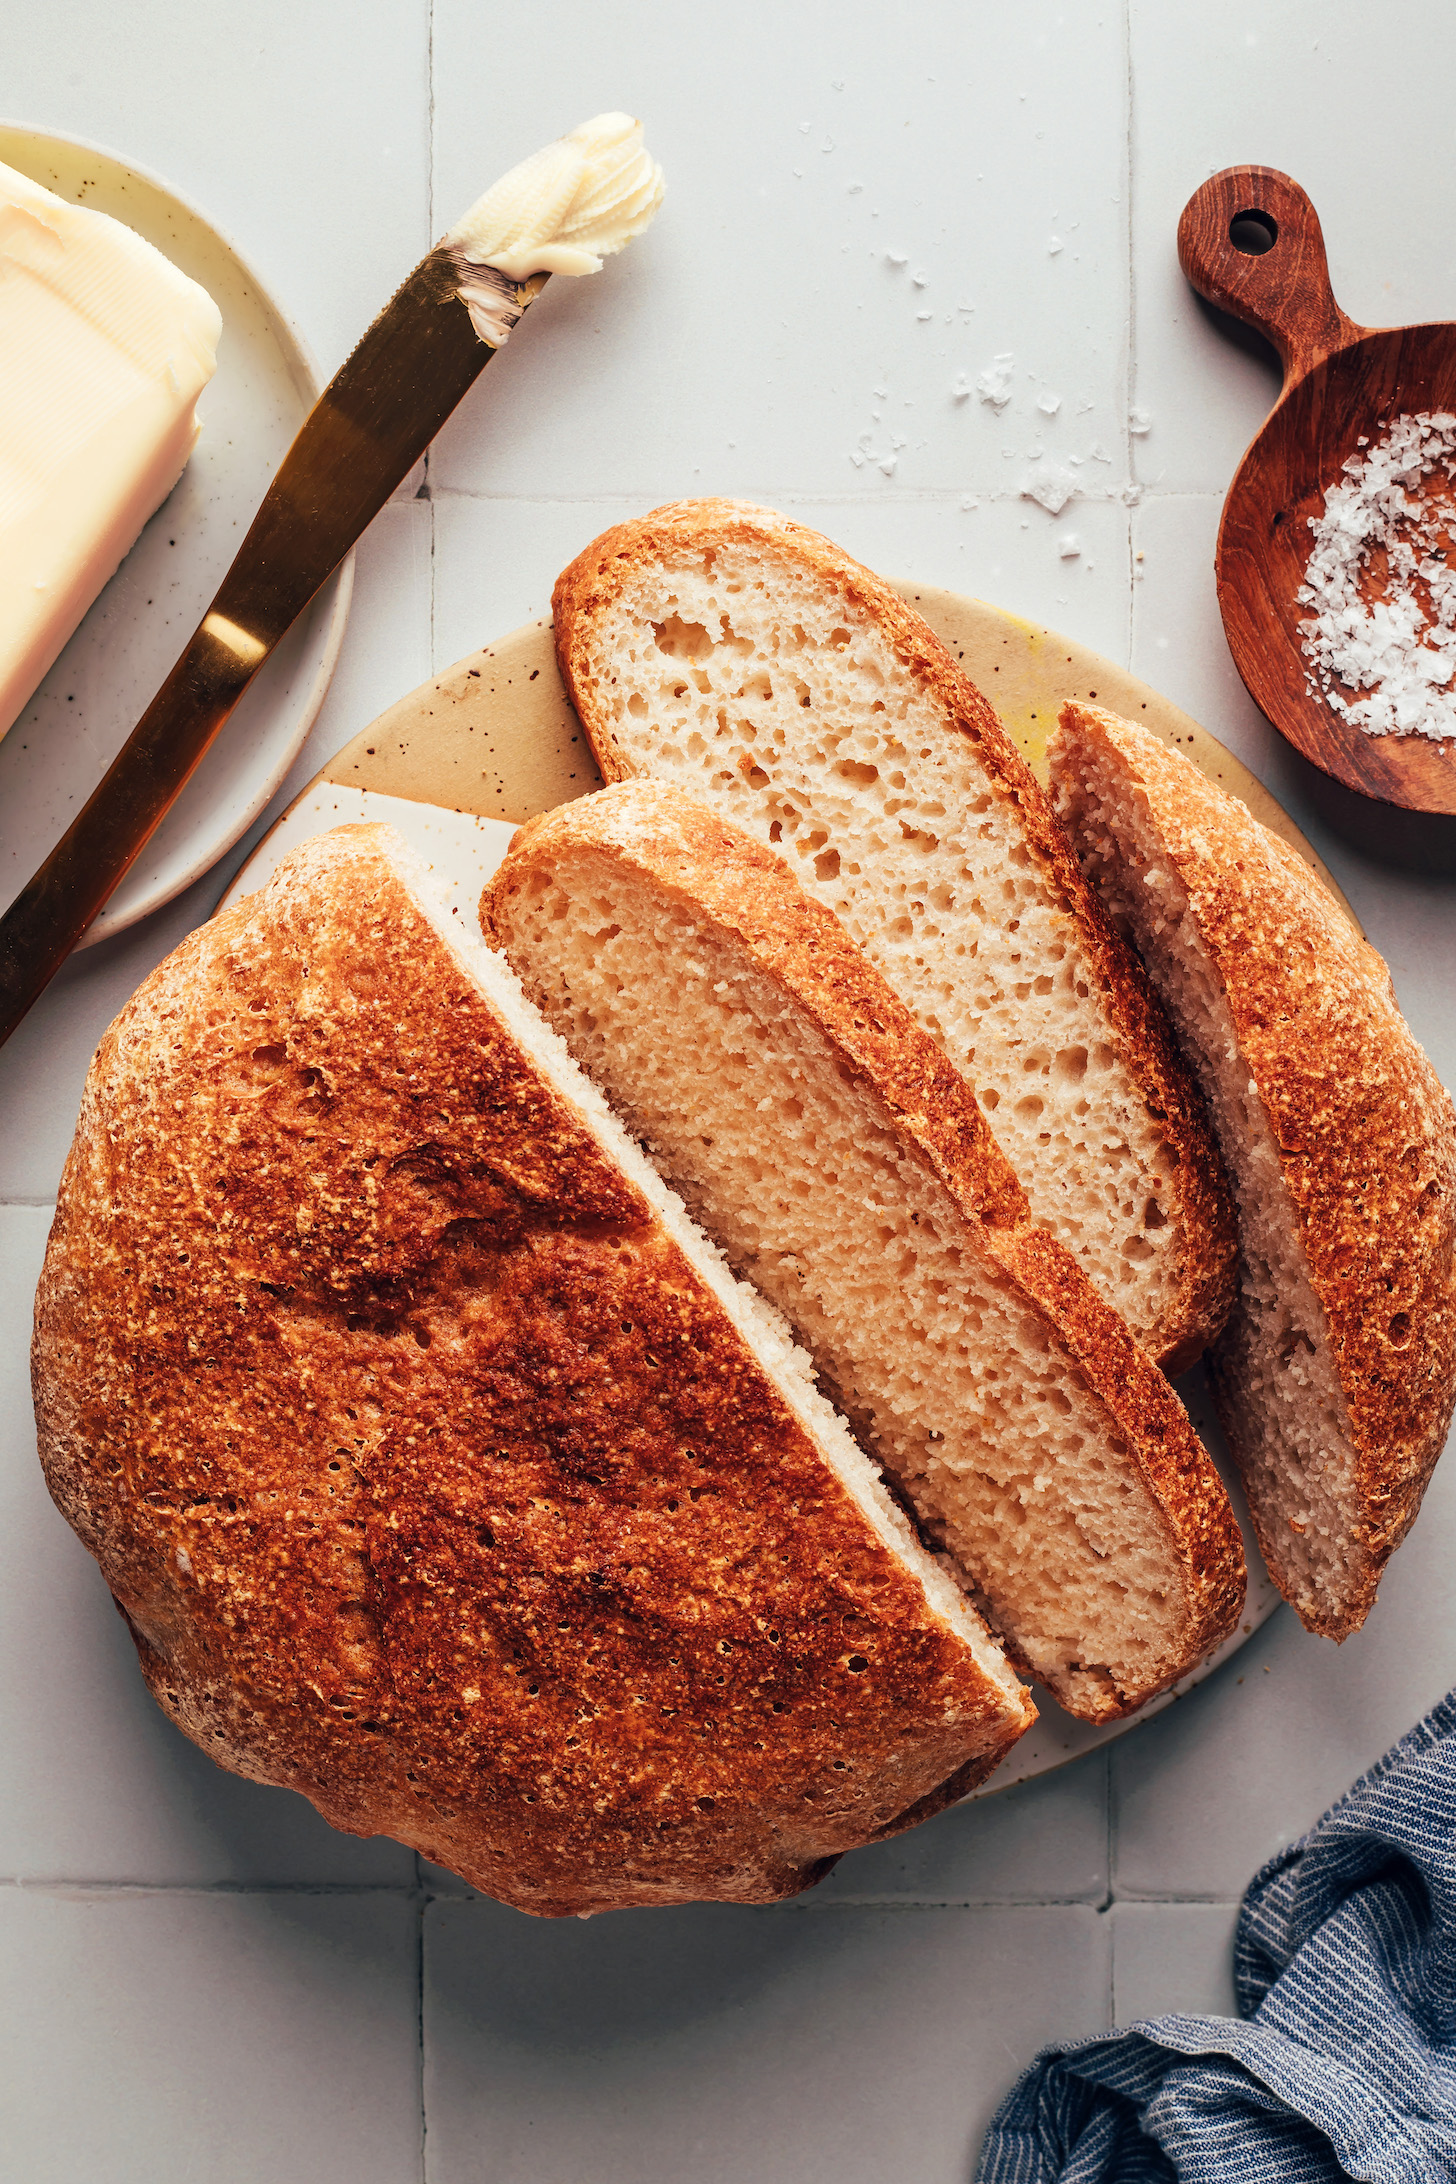
Maintain the cellphone. We’ve dreamed of this bread all of our gluten-free days and it has lastly arrived. Introducing probably the most fluffy, chewy, completely textured, crusty, artisan-style gluten-free bread you possibly can ever think about. We’re in LOVE! Easy flours, minimal energetic prep, actually life-changing.
All that stands between you and this vegan + gluten-free loaf are 7 elements and just a little little bit of time. It’s the proper weekend exercise, and there’s nothing higher than beginning the work week with a recent loaf of bread! Let’s bake!
Tips on how to Make Artisan-Model Gluten-Free Bread
This gluten-free artisan-style bread begins like a conventional bread recipe: with activating the yeast in heat sugar water, giving it a basic style and exquisite rise.
After that, issues get just a little completely different! To imitate the chewy, versatile, sticky texture of gluten, this loaf depends on a particular ingredient that’s nicely price including to your gluten-free pantry: psyllium husk powder!
Psyllium is KEY to the undetectably gluten-free texture of this bread, and there’s simply nothing fairly prefer it. Bonus? It’s a fiber-rich ingredient with some fairly spectacular digestive well being advantages.
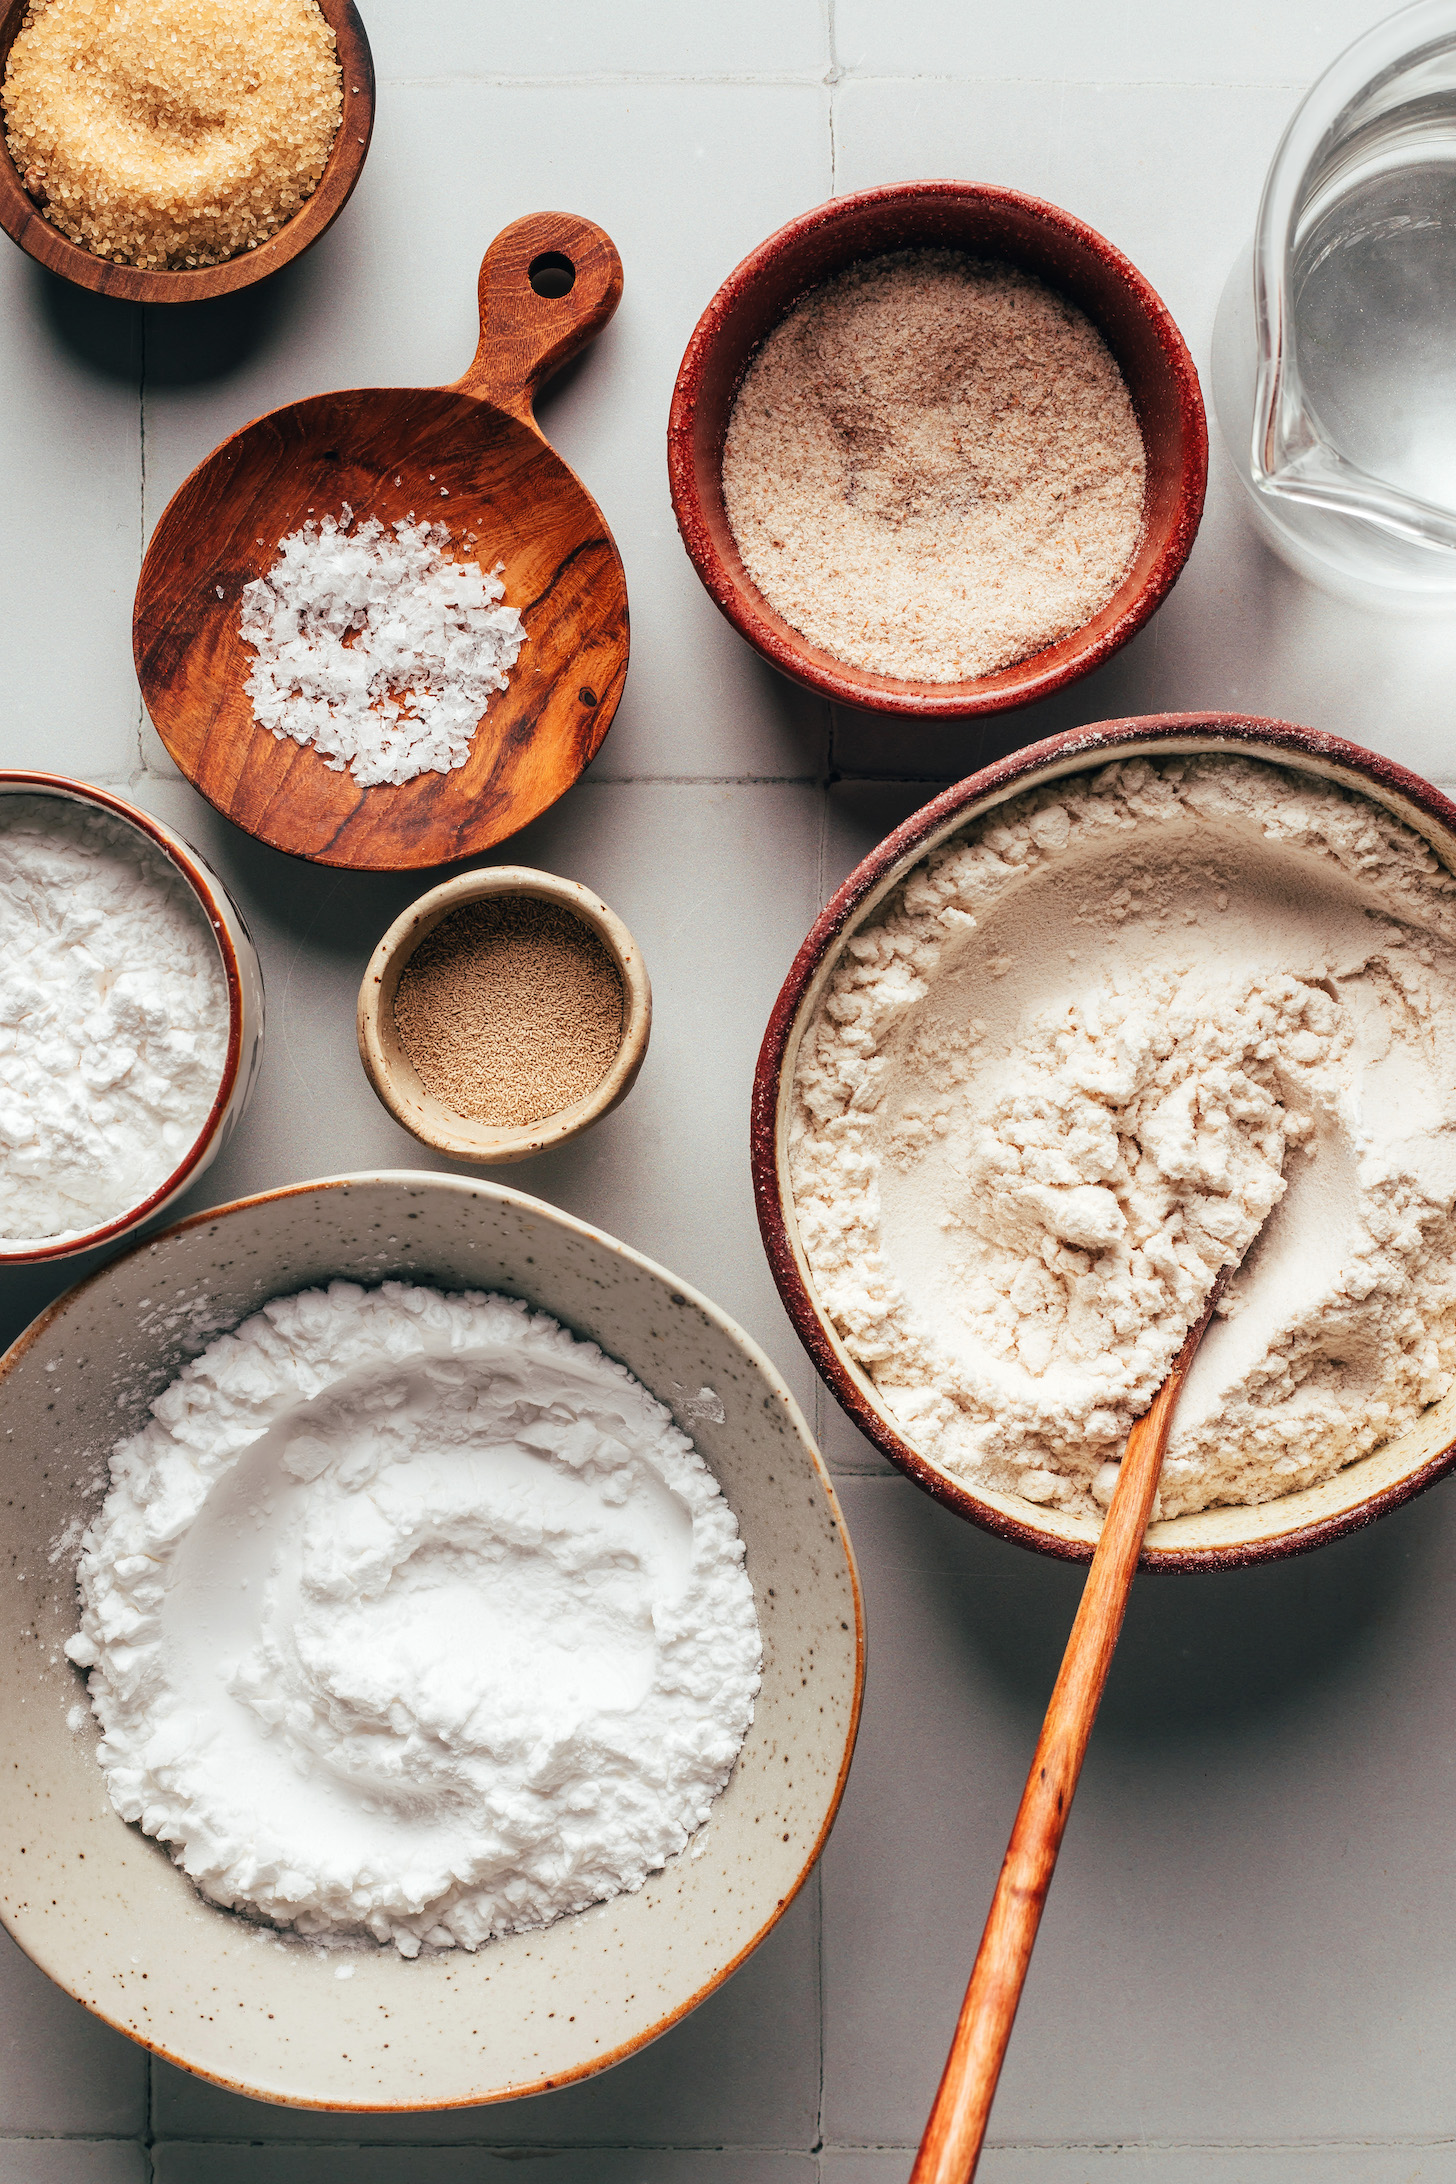
Now that we’ve gotten that important ingredient out of the best way, let’s speak about our trio of gluten-free flours, which can be essential for the appropriate texture!
Brown rice flour is the first ingredient, giving the bread construction and a healthful, impartial taste. The opposite two are potato starch to maintain it mild and fluffy and tapioca flour to provide the dough just a little stretch. The ultimate ingredient is salt for taste!
After including the flours, you’ll be leaping into just a little finger exercise (until you’ve a mixer with a dough hook). Vigorously kneading the dough helps to hydrate the flours and evenly distribute the psyllium, making certain the most effective texture.
Then we form it, let it rise, and it’s time to bake. Our most well-liked technique is in a Dutch oven as a result of it simply captures steam, making the skin of the bread shiny, stretchy and pliable. However in the event you solely have a baking sheet or loaf pan, we predict you’ll nonetheless be impressed with the outcome!
Take a look at that bubbly magnificence!
We are able to’t wait so that you can do this bread! It’s:
Chewy
Fluffy
Stunning
Crusty on the skin
Comfortable on the within
& SO scrumptious!
It reminds us of bread that’s usually served as a starter at fancy eating places with mushy, spreadable butter or an herby olive oil + balsamic dipping sauce.
However the serving choices know no limits! Take pleasure in it with nut butter, alongside soups, and for making bruschetta, grilled “cheese” sandwiches, and extra.
Extra Gluten-Free Bread Recipes
For those who do this recipe, tell us! Go away a remark, charge it, and don’t overlook to tag a photograph @minimalistbaker on Instagram. Cheers, mates!

Servings 8 (Slices)
Forestall your display from going darkish
- 1 ⅓ cup heat water
- 2 Tbsp cane sugar (or sub maple syrup)
- 2 ¼ tsp energetic dry yeast (1 packet yields 2 ¼ tsp or 7 g)
- 1 ½ Tbsp psyllium husk powder* (not entire // we like Anthony’s Items)
- 1 cup brown rice flour
- 3/4 cup potato starch (NOT potato flour)
- 1/2 cup tapioca flour (additionally referred to as tapioca starch)
- 1 tsp sea salt
INSTRUCTIONS FOR A DUTCH OVEN OR LOAF PAN
-
Mud a proofing basket with brown rice flour -OR- flippantly coat a small mixing bowl with water (so the flour sticks) after which mud with flour. Put aside. If utilizing a loaf pan, simply oil the loaf pan and mud it with brown rice flour. See notes for extra directions for utilizing a loaf pan.
-
In a small mixing bowl or liquid measuring cup, whisk collectively the nice and cozy water (100-110 levels F / 38-43 C) and sugar till the sugar is dissolved. Whisk within the yeast and let it bloom on the counter for about 10-Quarter-hour till frothy. If it doesn’t foam, begin over — your water might have been too scorching or the yeast was expired.
-
As soon as the yeast has bloomed, whisk within the psyllium husk powder and let the combination gel for about 10 minutes.
-
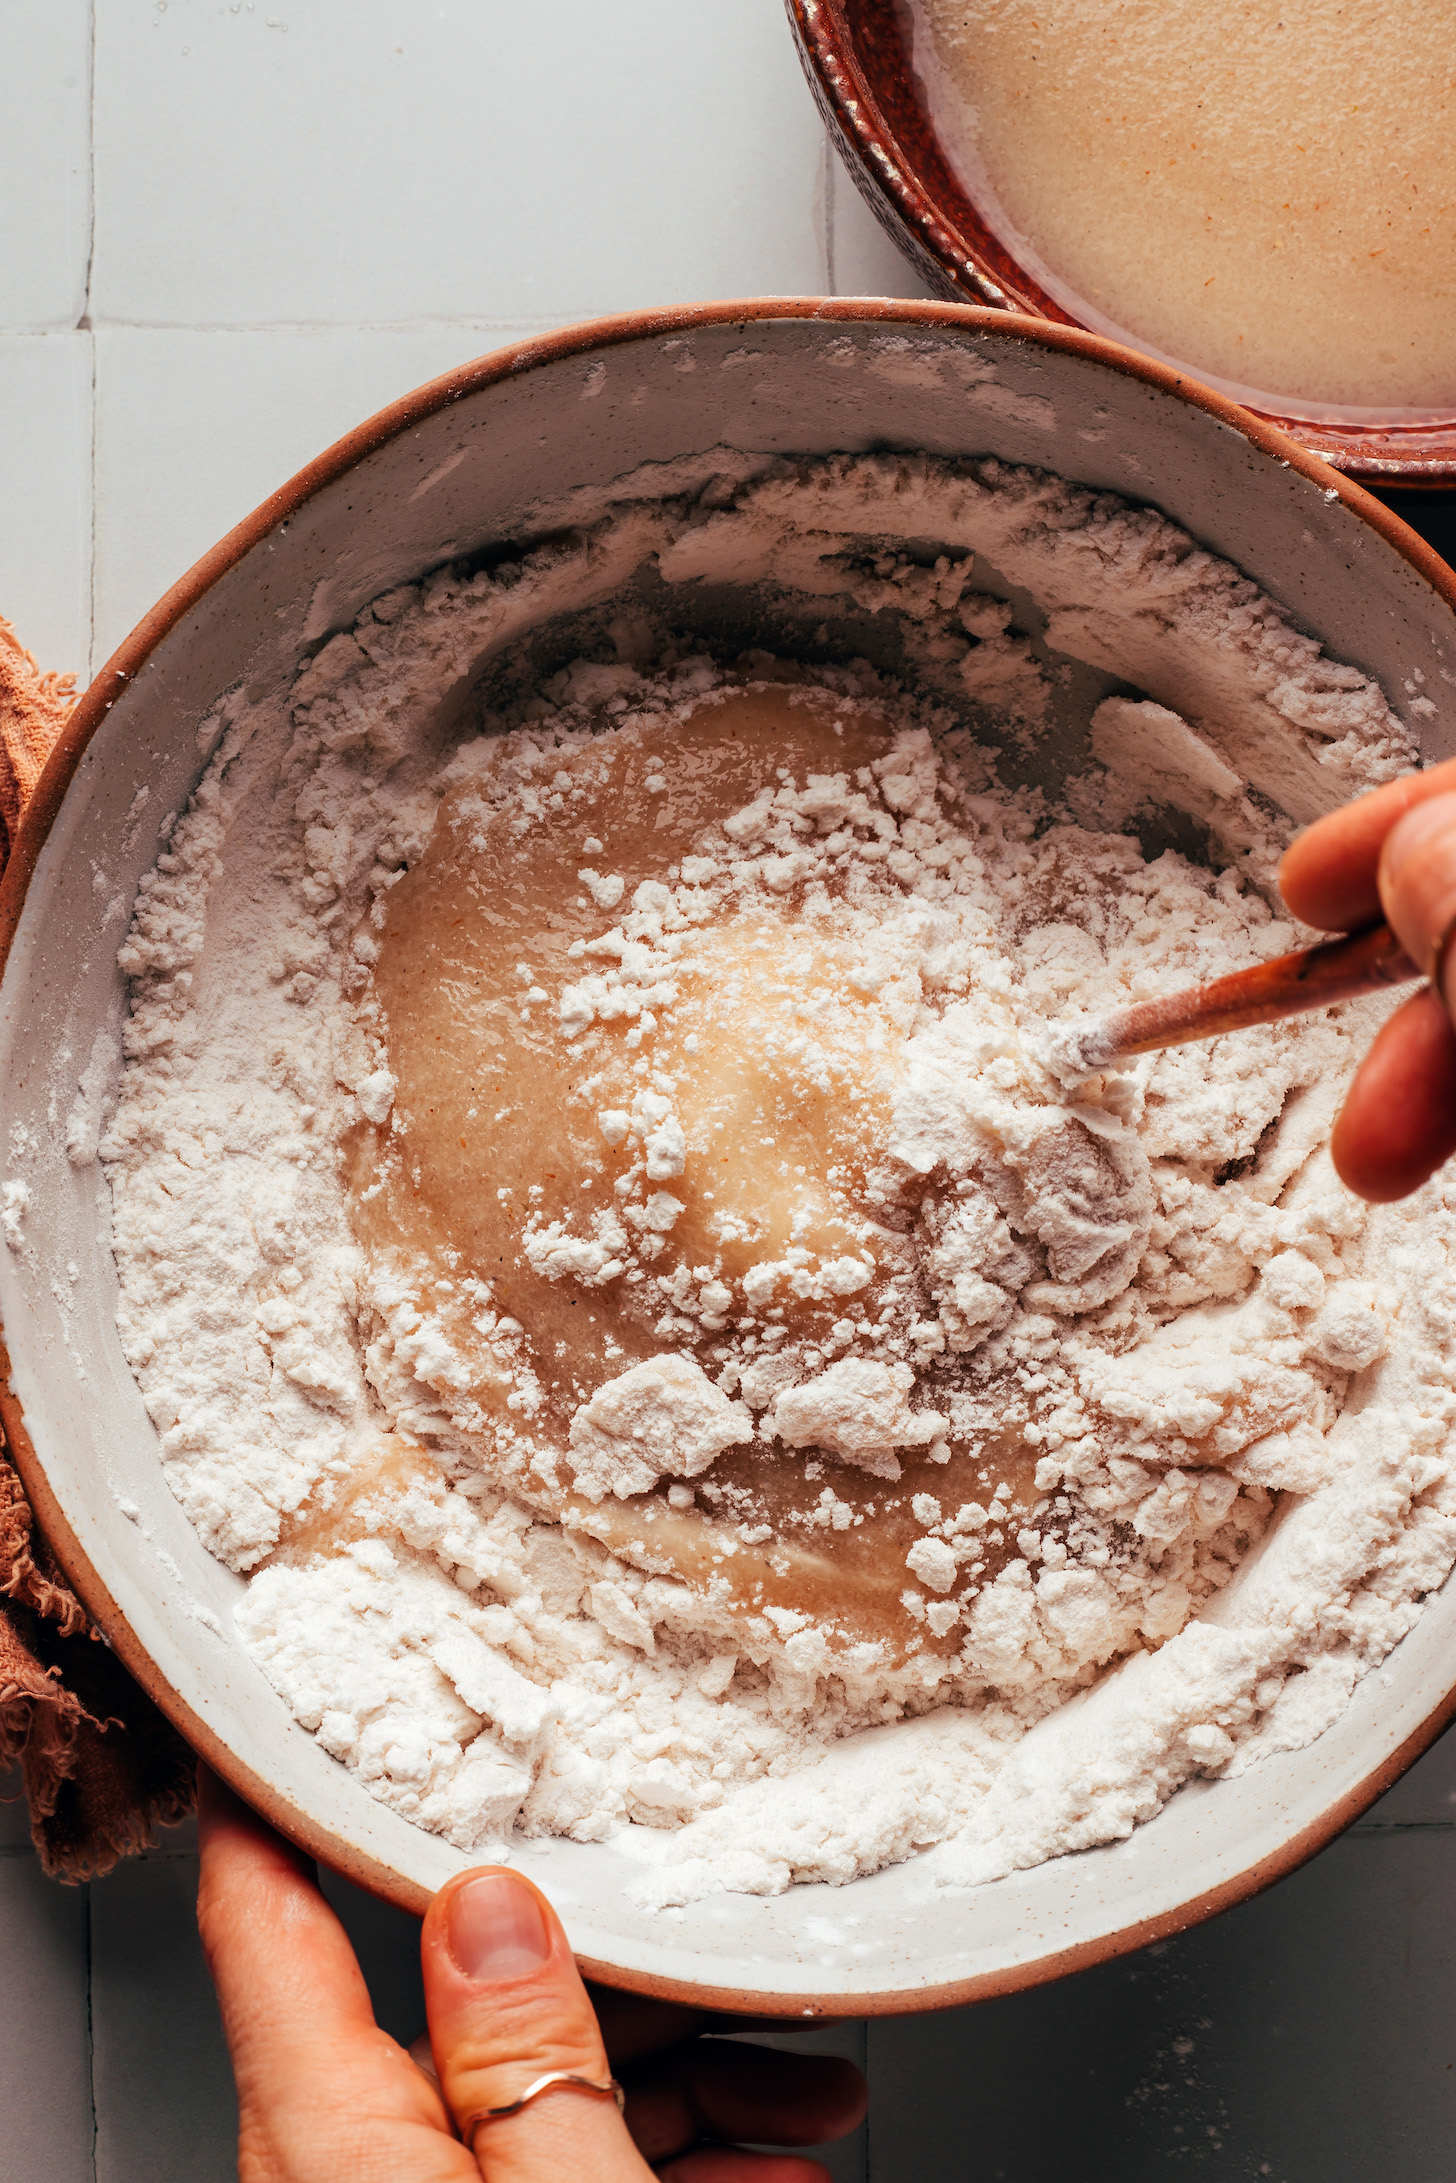
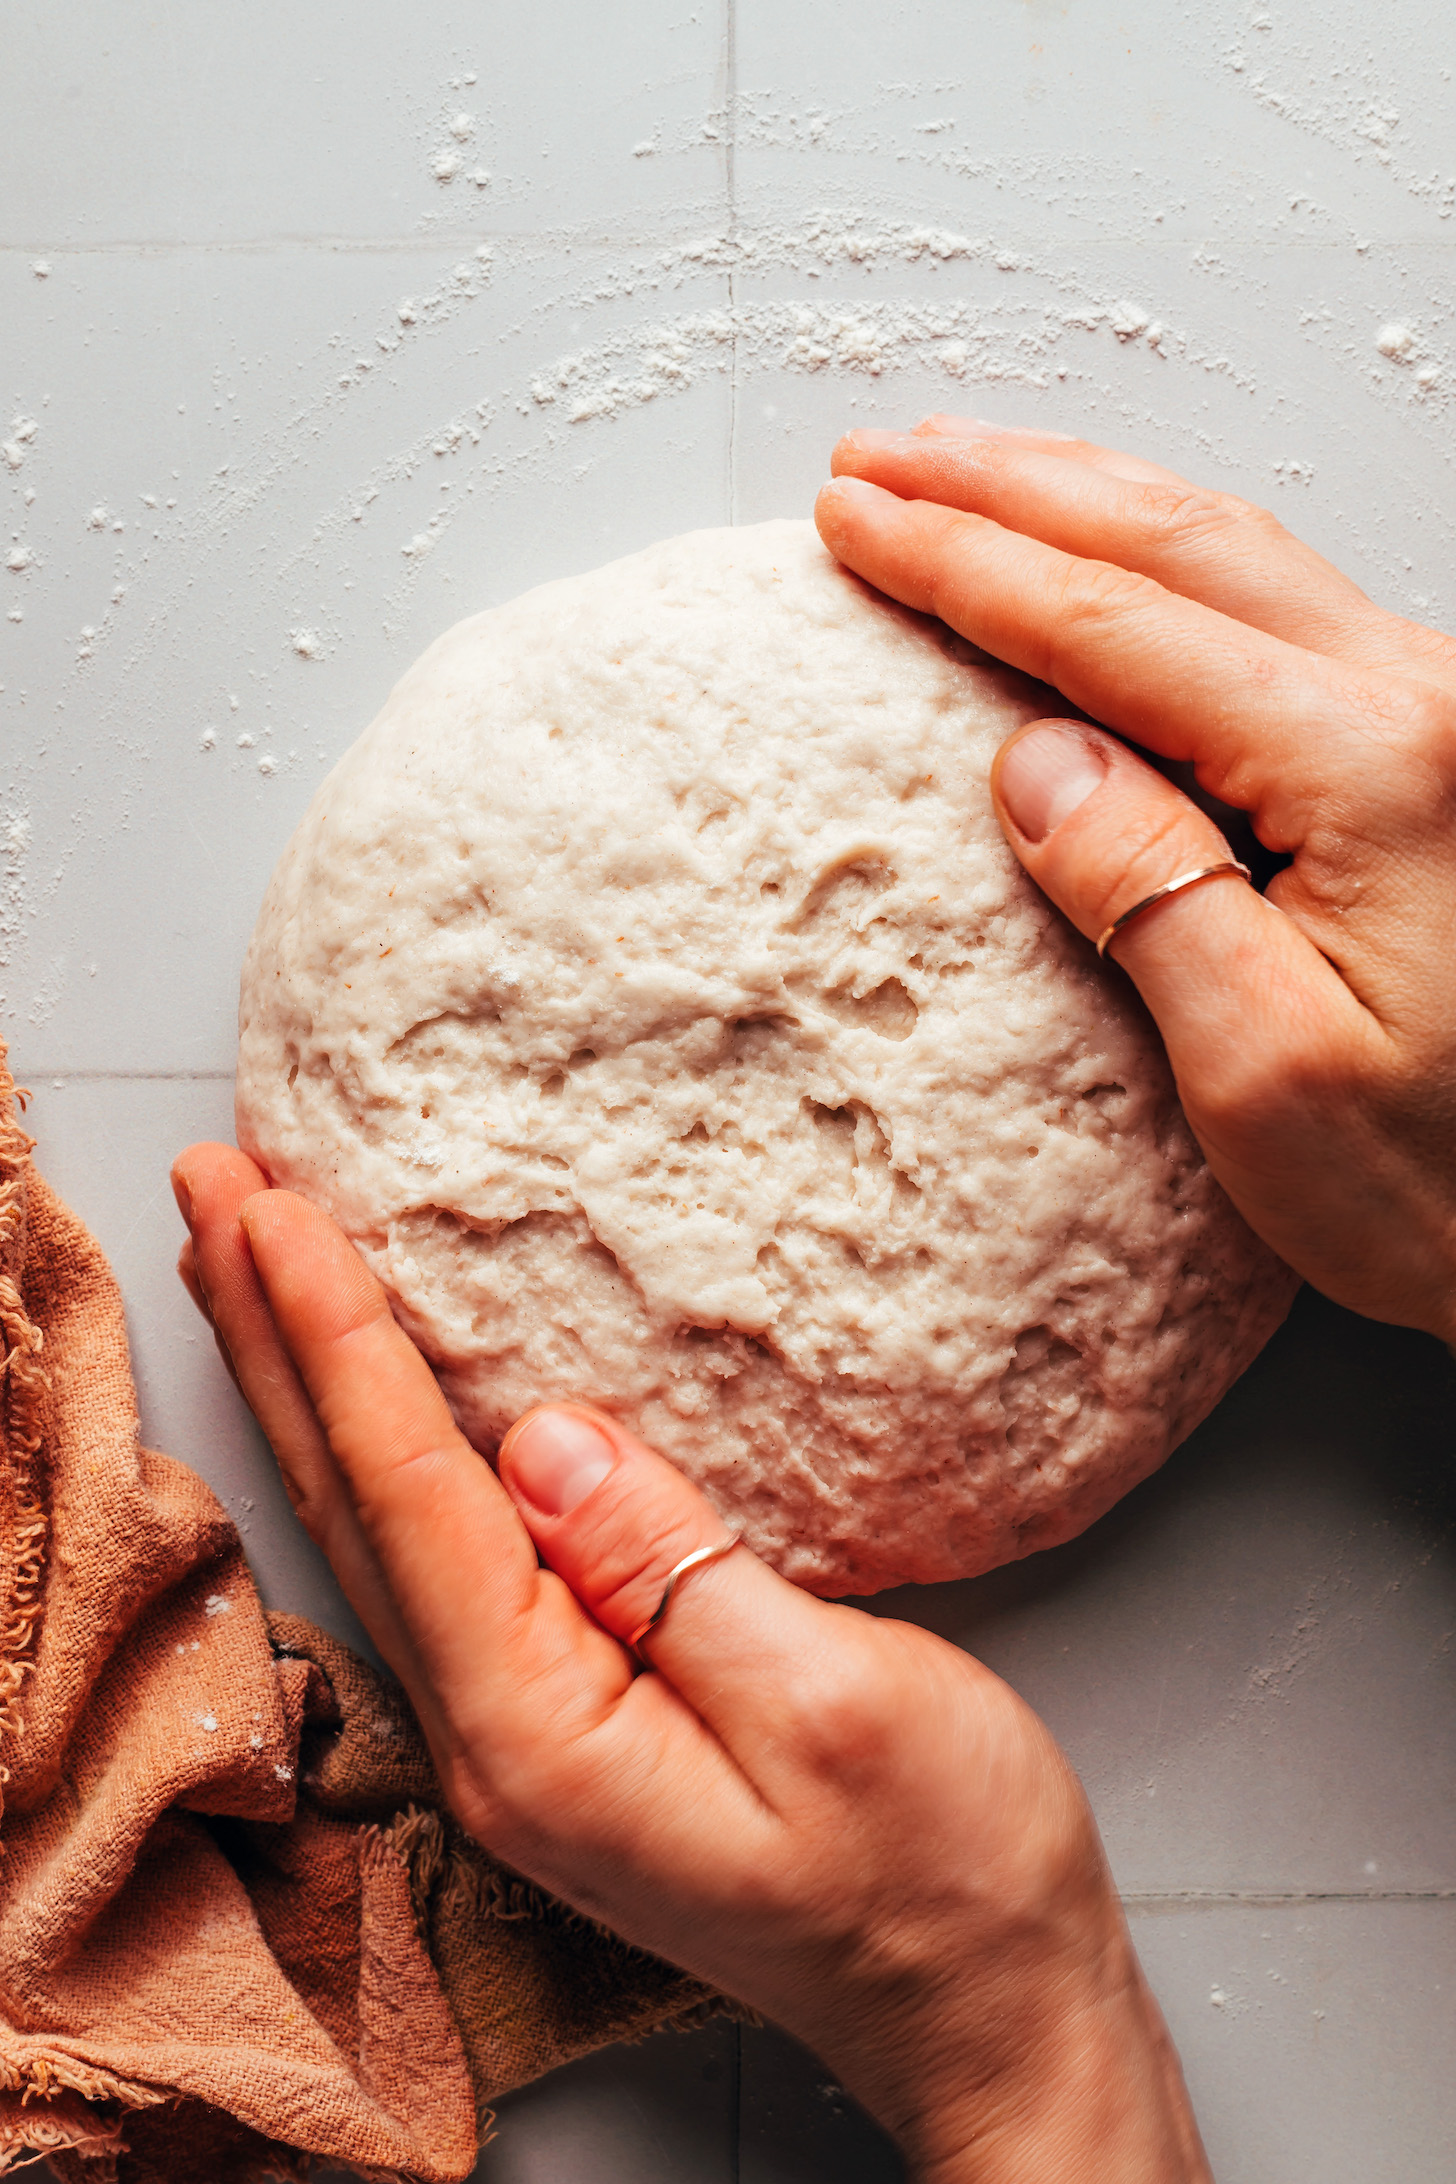
In the meantime, to a medium mixing bowl, add brown rice flour, potato starch, tapioca flour, and salt. Whisk nicely to mix. As soon as the yeast combination has rested, add it to the dry elements. Use a picket spoon or spatula to combine totally. The dough ought to look shaggy to begin. As soon as it turns into tough to stir, use your fingers to vigorously knead right into a cohesive but nonetheless very sticky ball. It ought to take not less than 3 minutes* to totally break the flour down into the liquid. Be at liberty to squeeze the dough between your fingers to totally incorporate it (our most well-liked technique). Your fingers will get sticky and be coated with dough — that is regular and inspired!
-
Scrape the surplus dough out of your fingers and place it again into the bowl. Wash and dry your fingers nicely. The dough needs to be cheesy however mixed sufficient that you’ll be able to deal with it. If it’s nonetheless too sticky, spend further time kneading the dough collectively.
-
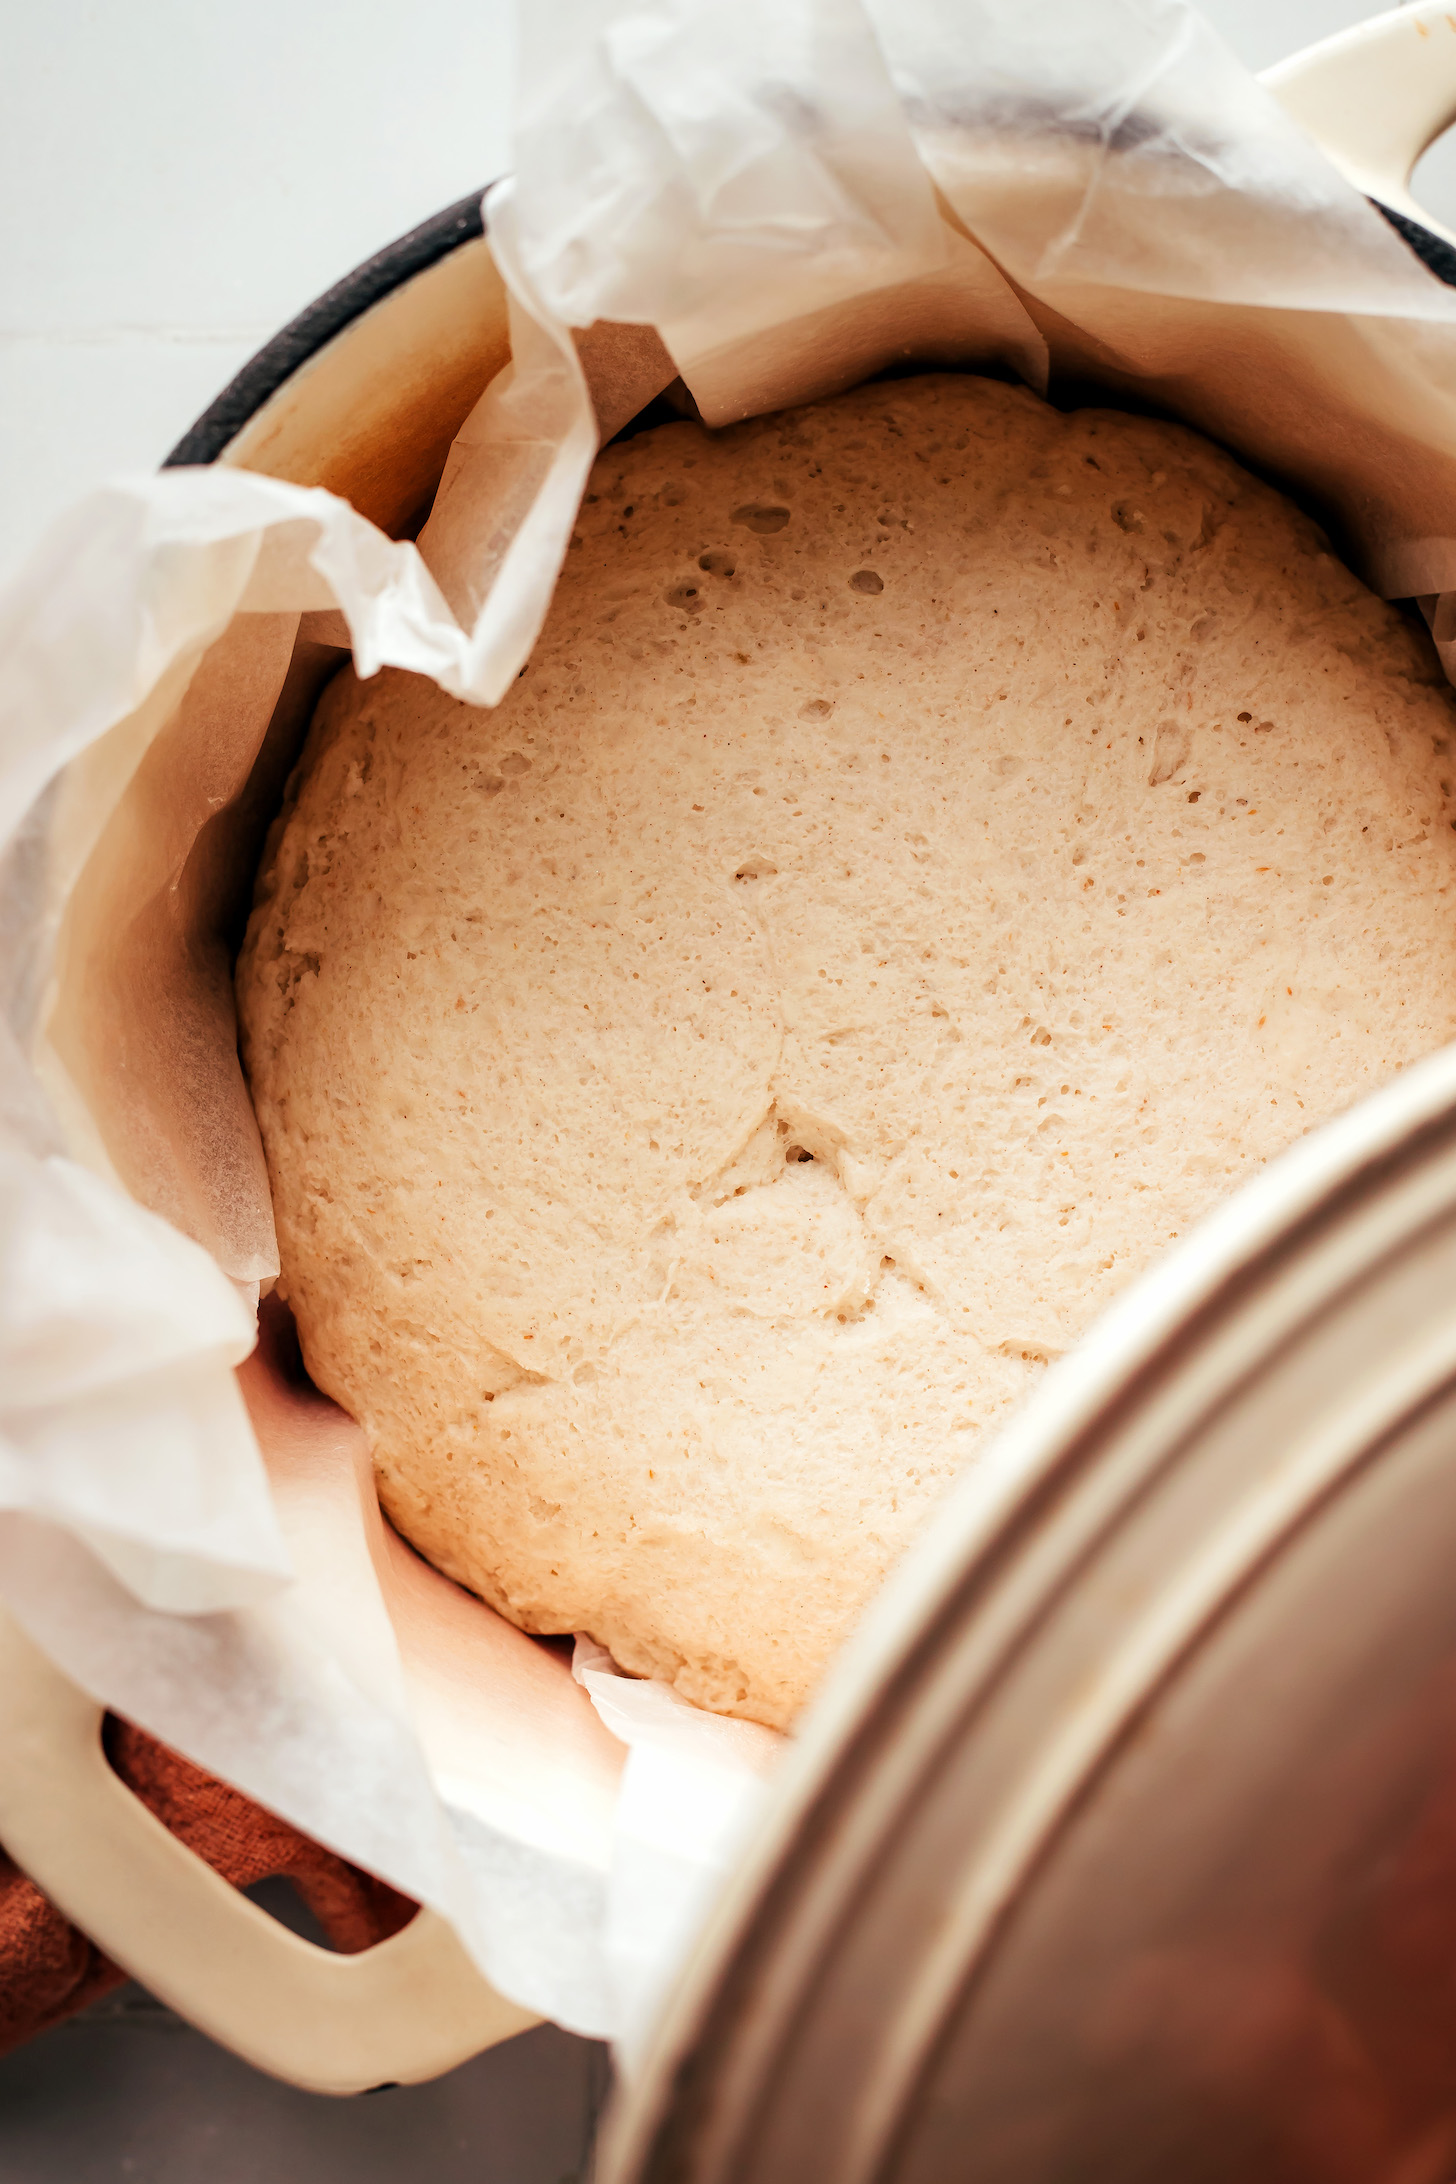
Flip the dough out onto your work floor. You shouldn’t want flour to form it, however in the event you do, use little or no! Use your fingers to form the dough right into a ball and place it into your ready proofing basket, flour-dusted bowl, or flour-dusted loaf pan. For those who discover your fingers are sticking to the dough, be at liberty to moisten them barely with water. If utilizing a loaf pan, unfold the dough so it is near the corners of the pan – it can unfold additional because it rises. Cowl your dough ball with a towel and let rise in a heat place for Half-hour till it has nearly doubled in dimension.
-
After the Half-hour is up, place a Dutch oven (with the lid on) into the oven and preheat it to 450 levels F (232 C). If utilizing a loaf pan, reference the timing within the notes part as a substitute of the subsequent two directions.
-
As soon as the oven is preheated and your Dutch oven is scorching, place a chunk of parchment paper onto your work floor and gently flip the dough out onto it, utilizing your hand on the backside of the dough to information it. Use oven mitts to rigorously take away your Dutch oven from the oven, place it onto a heatproof floor, and take the lid off of it. Raise the perimeters of the parchment paper to position your dough (and the parchment paper) into the Dutch oven. Place 3-4 ice cubes on the skin of the parchment paper so they don’t seem to be touching the dough. Put your oven mitts again on and place the lid again onto the Dutch oven. Place the Dutch oven again into the oven on the middle rack and bake for 35 minutes.
-
As soon as the 35 minutes have handed, decrease the oven temperature to 425 levels F (218 C) and put your oven mitts again on to rigorously take away the lid from the Dutch oven and place it onto a heatproof floor. Shut your oven and bake for an additional 30-35 minutes with out the lid. The crust needs to be darkish and the bread ought to sound hole while you faucet it with a spoon or knife.
-
As soon as baked, use oven mitts to take away the Dutch oven from the oven. Use the parchment to rigorously raise the bread from the pan and place on a cooling rack to totally cool (~2-3 hours). You need the bread to be totally cooled earlier than slicing to keep away from a gummy texture. Retailer the bread in a bread wrap or bag at room temperature for as much as 2-3 days, although greatest inside the first 24 hours. You may also retailer the bread within the fridge for as much as 5 days or freeze sliced bread for 1 month (or longer). After refrigerating/freezing, toast the bread earlier than having fun with!
INSTRUCTIONS FOR A BAKING SHEET
-
Mud a proofing basket with brown rice flour -OR- flippantly coat a small mixing bowl with water (so the flour sticks) after which mud with flour. Put aside.
-
In a small mixing bowl or liquid measuring cup, whisk collectively the nice and cozy water (100-110 levels F / 38-43 C) and sugar till the sugar is dissolved. Whisk within the yeast and let it bloom on the counter for about 10-Quarter-hour till frothy. If it doesn’t foam, begin over — your water might have been too scorching or the yeast was expired.
-
As soon as the yeast has bloomed, whisk within the psyllium husk powder and let the combination gel for about 10 minutes.
-
In the meantime, to a medium mixing bowl, add brown rice flour, potato starch, tapioca flour, and salt. Whisk nicely to mix. As soon as the yeast combination has rested, add it to the dry elements. Use a picket spoon or spatula to combine totally. The dough ought to look shaggy to begin. As soon as it turns into tough to stir, use your fingers to vigorously knead right into a cohesive but nonetheless very sticky ball. It ought to take not less than 3 minutes* to totally break the flour down into the liquid. Be at liberty to squeeze the dough between your fingers to totally incorporate it (our most well-liked technique). Your fingers will get sticky and be coated with dough — that is regular and inspired!
-
Scrape the surplus dough out of your fingers and place it again into the bowl. Wash and dry your fingers nicely. The dough needs to be cheesy however mixed sufficient that you’ll be able to deal with it. If it’s nonetheless too sticky, spend further time kneading the dough collectively.
-
Flip the dough out onto your work floor. You shouldn’t want flour to form it, however in the event you do, use little or no! Use your fingers to form the dough right into a ball and place it into your ready proofing basket or flour-dusted bowl. For those who discover your fingers are sticking to the dough, be at liberty to moisten them barely with water. Cowl your dough ball with a towel and let rise in a heat place for Half-hour till it has nearly doubled in dimension.
-
After the Half-hour is up, boil 1 cup (240 ml) of water. Preheat your oven to 450 levels F (232 C), place an oven rack in the course of your oven and a rack under that one, discover two baking sheets, and put aside.
-
As soon as the oven is preheated, place one of many baking sheets on the decrease oven rack and punctiliously fill with the boiling water. Gently flip the dough out onto the opposite baking sheet, utilizing your hand on the backside of the dough to information it. Place the baking sheet with the dough into the oven on the upper baking rack and bake at 450 levels F (232 C) for Half-hour. Decrease the temp to 425 levels F (218 C) and bake for an additional 25-Half-hour. The crust needs to be darkish and the bread ought to sound hole while you faucet it with a spoon or knife.
-
As soon as baked, use oven mitts to take away the pan from the oven then rigorously raise the bread from the pan and place on a cooling rack to totally cool (~2-3 hours). You need the bread to be totally cooled earlier than slicing to keep away from a gummy texture. Retailer the bread in a bread wrap or bag at room temperature for as much as 2-3 days, although greatest inside the first 24 hours. You may also retailer the bread within the fridge for as much as 5 days or freeze sliced bread for 1 month (or longer). After refrigerating/freezing, toast the bread earlier than having fun with!
*Loaf pan directions: For those who don’t have a Dutch oven, you’ll be able to bake the bread in a standard-size metallic loaf pan — merely proof the bread within the loaf pan you propose on baking it in as a substitute of a bowl or proofing basket. Bake at 450 F (232 C) for 25 minutes, then decrease the oven temperature to 425 F (218 C) and bake for an additional 25 minutes. You possibly can skip the ice cubes/pan of water if baking in a loaf pan.
*If in case you have a stand mixer with a dough hook, you need to use that to combine in step 4.
*In order for you to organize the dough the evening earlier than baking, skip the rise at room temperature and put the dough straight within the fridge (coated) after shaping. When able to bake, let rise on high of the oven (or in a heat spot) for 20-Half-hour whereas the oven preheats. Then bake as instructed.
*Psyllium husk powder is an important ingredient on this recipe and we don’t suggest substituting anything. If in case you have entire psyllium husk (not powder), you may be capable of grind it in a spice grinder and add extra of it till the feel resembles the images, however we are able to’t assure the outcome.
*Psyllium SEED powder and psyllium HUSK powder should not the identical factor. You’ll want psyllium HUSK powder for this recipe.
*Herby oil + vinegar dipping sauce: Combine equal elements high-quality further virgin olive oil and balsamic vinegar with a pinch every of flaky sea salt, crushed pink pepper flakes, and dried oregano or Italian herb mix; add extra of any part to style.
*Diet data is a tough estimate calculated with out non-compulsory elements.
Serving: 1 slice Energy: 166 Carbohydrates: 38.4 g Protein: 2 g Fats: 0.8 g Saturated Fats: 0.3 g Polyunsaturated Fats: 0.2 g Monounsaturated Fats: 0.3 g Trans Fats: 0 g Ldl cholesterol: 0 mg Sodium: 297 mg Potassium: 74 mg Fiber: 2.8 g Sugar: 3.4 g Vitamin A: 0 IU Vitamin C: 0 mg Calcium: 9 mg Iron: 0.5 mg